
Monday, November 28, 2011
Happy Cyber Monday!
I took the plunge and decided to do some Cyber Monday shopping for once. I've wanted a new digital camera for some time since its quite obvious that the one we have takes far from stellar photos. I knew that I wanted a camera that did well in lower light situations and has a good macro feature and after researching all weekend, I decided a Nikon would be a good fit for me. I found a great deal on a P700 from Best Buy and my new toy will be arriving in 5-7 business days! It has similar functionality as a DSLR without all the bulk. One day we may be urgrading to a DSLR, but for now I think I'll be happy with this point and shoot. Isn't she pretty?

Friday, November 25, 2011
My Top Secret Beer Bread Stuffing
About 6 Thanksgiving's ago I decided to experiment with stuffing. I had only made Stove Top before this, so I did some research and realized that it really would not be that difficult to make. I came up with this recipe after comparing several different recipes, one of which came from Gourmet magazine, and adapted it to my own liking. Here is my take on stuffing. Yes there are several steps involved, but it is so worth it.
3 cups self rising flour
1/2 cup sugar
12oz beer (really anything you have will work, but I prefer a red or brown ale for its flavor)
Directions:
Preheat oven to 375 degrees. In a large bowl, mix the flour and sugar until combined. Stir in the beer, and mix until all the flour has been absorbed. Your batter will be very sticky. Transfer this to a well greased loaf pan and bake for 55-60 minutes or until bread is golden brown, and there is a nice hard crust on top.


1 loaf beer bread
2 cups onion, chopped
1 1/2 cups celery, chopped
2 golden delicious apples, peeled and chopped
1 stick of butter
1 tsp rubbed sage
1 tsp dried thyme
1 tsp salt + more to taste
1/2 tsp pepper + more to taste
dash of nutmeg
2 cups chicken broth
Preheat oven to 400 degrees. Cut the bread into small cubes, toast for 8-10 minutes on a baking sheet in oven until golden brown. Transfer bread cubes to a large mixing bowl add sage, thyme, 1 tsp salt, and 1/2 tsp pepper. Adjust oven temperature to 325 degree. In the meantime, saute the onion and celery in a large pan in 6 tbsp of butter over med-high heat for about 6 minutes, or until soft. Season with salt and pepper. In a separate pan, saute the apples in 2 tbsp butter. Season with a dash of nutmeg and cook over med-high heath until soft, about 5 minutes.
Transfer the apples, celery and onion to the bowl with the breadcrumbs, add chicken broth and stir until well combined. Transfer to a 9x13 baking pan and bake for 25-30 or until golden brown on top.


Beer Bread Stuffing
Beer Bread
Ingredients: 3 cups self rising flour
1/2 cup sugar
12oz beer (really anything you have will work, but I prefer a red or brown ale for its flavor)
Directions:
Preheat oven to 375 degrees. In a large bowl, mix the flour and sugar until combined. Stir in the beer, and mix until all the flour has been absorbed. Your batter will be very sticky. Transfer this to a well greased loaf pan and bake for 55-60 minutes or until bread is golden brown, and there is a nice hard crust on top.

Sticky, sticky batter

Before baking

Perfectly baked bread!
For the Stuffing
Ingredients:1 loaf beer bread
2 cups onion, chopped
1 1/2 cups celery, chopped
2 golden delicious apples, peeled and chopped
1 stick of butter
1 tsp rubbed sage
1 tsp dried thyme
1 tsp salt + more to taste
1/2 tsp pepper + more to taste
dash of nutmeg
2 cups chicken broth
Preheat oven to 400 degrees. Cut the bread into small cubes, toast for 8-10 minutes on a baking sheet in oven until golden brown. Transfer bread cubes to a large mixing bowl add sage, thyme, 1 tsp salt, and 1/2 tsp pepper. Adjust oven temperature to 325 degree. In the meantime, saute the onion and celery in a large pan in 6 tbsp of butter over med-high heat for about 6 minutes, or until soft. Season with salt and pepper. In a separate pan, saute the apples in 2 tbsp butter. Season with a dash of nutmeg and cook over med-high heath until soft, about 5 minutes.
Transfer the apples, celery and onion to the bowl with the breadcrumbs, add chicken broth and stir until well combined. Transfer to a 9x13 baking pan and bake for 25-30 or until golden brown on top.

All the ingredients

Toasted breadcrumbs

Chopped veg

Veg sauteing

Chopped apple

Apple sauteing with nutmeg

Combine ingredients

And bake!
Friday, November 18, 2011
Vinyl!! Plus links to Cameo Giveaways....I know you want one.
I have been playing around with my new Cameo and decided it was time to start vinyl-ing things. I knew that once I started, it would soon become an addiction, and I keep finding more things in my home that would benefit from the addition of vinyl. I also know that my newfound love of vinyl will more than likely transfer on to some upcoming Christmas presents, so I won't be posting those until after the holidays so as not to ruin the surprise for the recipient if they so happen to be reading this.
My first attempt at using vinyl came in the form of dressing up my Cameo. I am so in love with this. I got the peacock image from the Silhouette store (image peacock_C01202_23067 9/07/2011) I sized it to fit nicely on my machine and cut it out onto lovely purple vinyl. I was SO impressed with out intricate the cuts were on this. Yes it was a PITA to remove all the little bits, but I used my handy dandy hook tool and it made it a lot more easy than me trying to pick them out wth my fingernails.


My first attempt at using vinyl came in the form of dressing up my Cameo. I am so in love with this. I got the peacock image from the Silhouette store (image peacock_C01202_23067 9/07/2011) I sized it to fit nicely on my machine and cut it out onto lovely purple vinyl. I was SO impressed with out intricate the cuts were on this. Yes it was a PITA to remove all the little bits, but I used my handy dandy hook tool and it made it a lot more easy than me trying to pick them out wth my fingernails.

For my second vinyl project, I decided that we needed to clearly mark our recycle bin in our kitchen. We were having people over for my husband's birthday and I knew I'd the question of "Hey, do you recycle" over and over. I did a quick google image search for a recycle symbol and used the Silhouette design software's trace functionality to cut this out onto black vinyl. I wasn't too happy with the way it came out, and you really can't tell unless you look very closely but the cut lines were not super clean on this one. I blame the image I used though, as it wasn't very crisp to begin with. All in all, it serves its purpose and I like how it turned out.


And now for the giveaway links. Just to let you know, I receive nothing by promoting these giveaways, in fact I'm sure these bloggers do not know I even exist. I follow them, and saw their giveaways and thought that one of my lovely readers may want to take their chance at winning an amazing machine. You can find the giveaways at:
If you happen to win one of these, please let me know so that I can do a happy dance with you! Gooooood Luck!
Monday, November 14, 2011
Fun with Vinyl!
My new Cameo arrived on Halloween and I've been so busy the past couple weeks that I haven't spent a whole lot of time get acquainted with it yet. Sad, I know. I did order some vinyl with my new machine, and had to come up with some projects to experiment with it, so I took my time to watch youtube videos before jumping in.
 I found this adorable onesie over at Ashleyannphotography and knew that I wanted to replicate it for my friends daughter.
I got a great deal on heat transfer vinyl through a flash sale site called Scrapbook Steals. Mostly they just have scrapbook paper bundles, but they had one for Silhouette accessories last week, so I had to get in on that. The bundle I purchased came with glitter black heat and flocked white heat trasfer vinyl. I also purchased some more from Oh My Crafts since are running a 2/$20 on heat transfer.
For the onesie, I used the glitter black vinyl for the glasses, and downloaded the image glasses_1947 7/30/2009 from Silhouette. I resized it to fit on the onesie (5" wide) and set the cameo to cut it out, and followed the application instructions that came with the vinyl. I ended up having to increase the heat so that it was higher than what Silhouette suggested, but other than that, their instructions were spot-on. I bought some puffy paint for the "chain" and voila- here is the finished onesie:


I also picked up a cute fleece hoodie from Target, that I did not notice at the time had ears on the hood, but that just added to the cuteness! I used dark pink heat transfer vinyl for this one, and the paw print is part of the Efon font, which I downloaded from dafont.com. I added her initials to the center of the paw print, making sure to flip the font horizontally, so that they are faced the right way when I apply it to the jacket.


I can't wait to see my friends daughter wear these, and hopefully they like them!
I got a great deal on heat transfer vinyl through a flash sale site called Scrapbook Steals. Mostly they just have scrapbook paper bundles, but they had one for Silhouette accessories last week, so I had to get in on that. The bundle I purchased came with glitter black heat and flocked white heat trasfer vinyl. I also purchased some more from Oh My Crafts since are running a 2/$20 on heat transfer.
For the onesie, I used the glitter black vinyl for the glasses, and downloaded the image glasses_1947 7/30/2009 from Silhouette. I resized it to fit on the onesie (5" wide) and set the cameo to cut it out, and followed the application instructions that came with the vinyl. I ended up having to increase the heat so that it was higher than what Silhouette suggested, but other than that, their instructions were spot-on. I bought some puffy paint for the "chain" and voila- here is the finished onesie:


I also picked up a cute fleece hoodie from Target, that I did not notice at the time had ears on the hood, but that just added to the cuteness! I used dark pink heat transfer vinyl for this one, and the paw print is part of the Efon font, which I downloaded from dafont.com. I added her initials to the center of the paw print, making sure to flip the font horizontally, so that they are faced the right way when I apply it to the jacket.
Before:
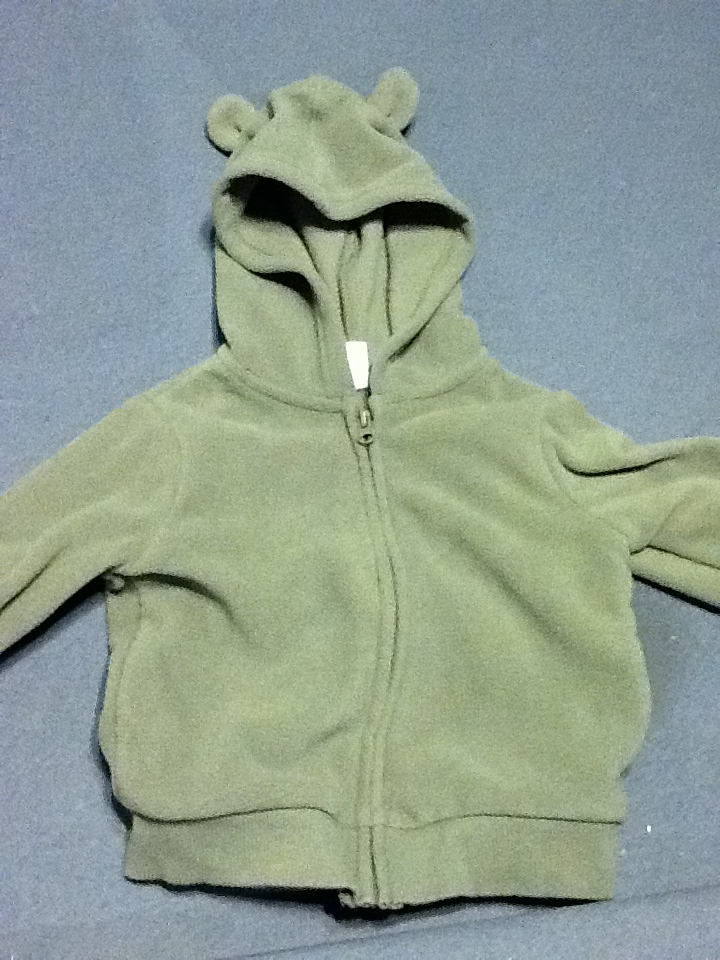
After:


I can't wait to see my friends daughter wear these, and hopefully they like them!
Tuesday, November 1, 2011
Confession
I broke down and ordered a Silhouette Cameo! I know I just bought my sd, but I had no idea how much I was going to love it and realized that I was limited with the size of the sd. I found a great deal on the Cameo through Oh My Crafts and with a coupon code, I ended up paying the same price for it that I paid for my sd. Once I placed my order, I set-up my sd to sell on eBay, and I may end up losing a little on it, its so going to be worth it in the end. Plus, some lucky person is going to get my practically brand new sd for a great price. Its a win-win!
Subscribe to:
Comments (Atom)